Why Steep Loose Descents Pulverize Your Knees
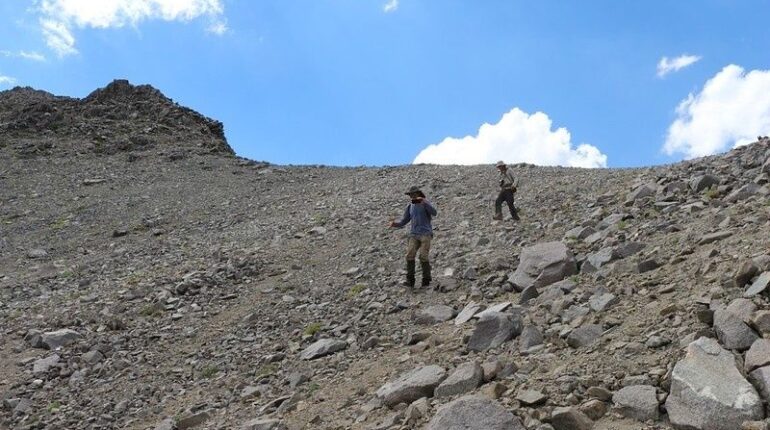
Heading down a steep scree slope? Your knees are doing more work than your lungs suggest. Every step requires your quadriceps, glutes, hamstrings, and ankle muscles to lengthen while they control downward momentum. That is an eccentric contraction, and it creates high braking forces through the knee. On loose ground, the surface also shifts after your foot lands, so your muscles must absorb movement while your joints search for stability. The patellofemoral joint, where the kneecap meets the thighbone, can take a serious beating when that control is poor.
The usual survival reactions make matters worse. You may lock your knees, lean far backward, or take long, cautious strides. Locked legs pass impact directly into joints and cartilage. A backward lean sends your feet forward, reducing traction and increasing the chance of a slide. The better answer is athletic suspension: soft knees, a subtle hip hinge, quick steps, and a chest position that stays committed over your feet. Once you understand the physics, a frightening descent becomes a series of small, controlled movements. The goal is not to fight gravity. It is to manage it.
Scree Versus Talus and How the Ground Actually Moves
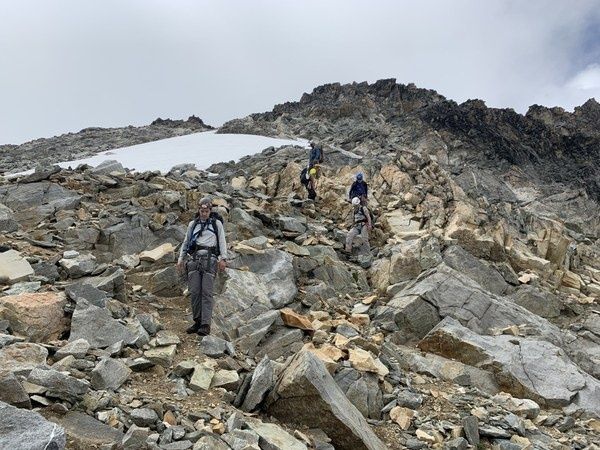
Scree is loose, broken rock that ranges from gravel to small stones. It behaves like a shifting matrix. When you load one step, particles roll, compress, or slide downhill. Talus is usually made of larger blocks and boulders that accumulated below cliffs or steep rock bands. Some blocks are solidly locked. Others pivot, slide, or collapse with almost no warning. Understanding the difference matters because the safest foot placement and speed control are not the same on both surfaces.
Before committing to a line, look for the path of least resistance. The surface may be more stable along a rib, near larger embedded rocks, or on a shallow diagonal rather than straight down. The basic geology is worth reviewing, and this overview of scree and loose rock aggregates helps explain why body weight can trigger movement. On any slope, friction determines how much force a foot can accept before it slides. If your downhill force exceeds available friction, a long stride or abrupt stop can turn into a fall. Keep momentum low, place each foot deliberately, and avoid sending rocks toward people below.
| Terrain | Footing Mechanics | Main Risk | Speed Control |
|---|---|---|---|
| Deep scree | Small stones shift and may accept a heel-plunge | Sliding, hidden holes, rock movement | Short steps, controlled gliding, frequent checks |
| Thin scree over hardpack | Loose particles sit on a firm, slippery base | Sudden loss of traction | Flat-foot placement and soft knees |
| Stable talus | Large blocks provide edges and platforms | Ankle rolls and awkward gaps | Slow, deliberate steps with visual testing |
| Unstable talus | Blocks pivot, rock, or slide under load | Crush injuries and uncontrolled falls | Three-point contact and conservative route choice |
The Biomechanics of the Soft Knee and Athletic Hip Hinge
A locked knee is a poor shock absorber. It leaves the muscles unable to lengthen smoothly, so the force travels into the joint and surrounding connective tissues. On a steep descent, repeated braking can quickly fatigue the quadriceps. As fatigue builds, your stride gets longer, your feet slap down harder, and your reactions slow. That is why a descent can become dangerous even when the route feels easy on your breathing.
Use a mountain-athletic stance instead. Keep both knees gently flexed. Hinge slightly from the hips, as if you are preparing to accept a light push from behind. Load the glutes and hamstrings without sitting back. Keep your chest open and your nose generally over your toes. Your center of mass should remain controlled over the part of the slope supporting you, not pulled dramatically uphill by fear. On very steep terrain, a small deliberate backward adjustment may help regulate speed, but do not lean so far back that your feet shoot forward.
Clinical slope research reinforces the need for active control. In a study of downhill walking at slopes up to 15 degrees, knee flexion, vertical ground-reaction force, and knee extension moment increased as the slope became steeper. The findings are specific to people with knee replacements and healthy older adults, not a direct prediction for every mountain athlete, but the mechanical lesson is useful: grade changes knee loading. Review the full study on downhill knee biomechanics before returning to steep terrain after surgery or a significant knee injury.
- Soft knees: Keep a small amount of flexion throughout the step.
- Hip hinge: Let the hips and glutes share the braking work.
- Committed chest: Stay balanced over your feet instead of collapsing backward.
- Quiet feet: Reduce stomping, hopping, and sudden braking.
- Early adjustment: Slow down before fatigue forces poor technique.
Step by Step Downhill Drills for Shifting Rock and Scree Runs
Practice these skills on low-consequence terrain before using them on a steep alpine line. Pick a short slope with a clean runout and no climbers below. Your first target is not speed. It is repeatable control. A high cadence reduces the time each foot spends carrying a large load and limits the amount of airtime between steps. Think of your feet as making rapid, quiet contacts rather than taking big leaps downhill.
- Start with the short-cadence shuffle. Take small steps, keep your knees soft, and let your feet remain close to the surface. Avoid jumping from one stable patch to another. If the ground moves, your next step should already be available.
- Use a heel plunge in deep scree. In sufficiently deep, soft scree, drive the heel gently into the material to create a temporary pocket. Keep your nose over your toes and allow a controlled amount of sliding. Do not stamp aggressively, because that can dislodge a larger fan of rock.
- Switch to flat-foot weighting on thin scree. When loose stones cover hardpack, a heel plunge may skid across the firm layer. Place the whole foot quietly, keep the ankle neutral, and let the knee and hip absorb movement.
- Test every suspicious rock. Tap or load a block progressively before transferring full weight. A rock that looks stable may pivot. If it moves, remove your weight and choose another option.
- Use three points on talus. When blocks are large, keep two feet and one hand, or two hands and one foot, in contact during transitions. Face into the slope when necessary. Slow movement is efficient when it prevents a fall.
Do not treat a controlled slide as failure. In deep scree, a deliberate heel-plunge can be smoother than trying to edge across unstable stones. But sliding must have a safe runout, and you need to confirm that no one is below. If a fall begins, stay calm, protect your head, and look for anchored surfaces rather than grabbing at loose gravel. On steeper terrain, face uphill, kick secure steps with your toes, and maintain at least three points of contact. Partners should not rush down a hazardous slope for a rescue. A rope from a safer position may be the better option.
Trekking Pole Integration for Dynamic Three Point Stability
Poles are not decoration on steep descents. They give you an earlier contact point, help detect unstable ground, and provide lateral balance while your legs manage the vertical load. For a steep downhill, lengthen the shafts by about 2 to 4 inches (5 to 10 centimeters). This lets you plant ahead without folding at the waist. Set the poles forward and slightly wide, not directly between your feet. Use them as active supports, then step into the space you have checked.
Good pole use can shift part of the ground-reaction demand away from your lower extremities, although the exact percentage varies with slope, technique, pole angle, and how much weight you place through the handles. Some practical guidance estimates that effective planting may unload roughly 15 to 20 percent of the reaction forces from the legs. Do not lean your entire body onto the poles. Your glutes and core still need to control the descent.
- Plant before the step: Place the downhill pole where it can catch a small slip.
- Keep hands free to react: Use a grip that allows quick release on technical talus.
- Do not trap your wrists: On high-angle blocks, remove or loosen straps so a fall does not twist the wrist or anchor the arm.
- Move poles independently: Stagger placements rather than making two blind plants at once.
- Carry an ice axe when appropriate: On snow or very steep alpine terrain, a pole is not a substitute for the tool and training the route requires.
Own Your Descent and Protect Your Joints for Life
Downhill alpine movement is an active technical skill. You are managing momentum, friction, balance, and muscle fatigue with every step. The winning pattern is simple: soften the knees, hinge at the hips, increase cadence, and place your feet before committing your body. Select stable terrain whenever possible. Avoid loose slopes when a safer line exists, and respect changing weather, altitude, visibility, and rockfall exposure.
Before every 14er descent, run through a quick gear check and movement check. Are your laces secure? Are your poles adjusted for downhill travel? Is there a safe runout? Then repeat the three primary cues: soft knees, short strides, committed chest position. If knee pain becomes sharp, swelling develops, the joint catches, or the knee gives way, stop treating the problem as normal fatigue. Reduce loading and seek assessment from a qualified medical professional.
- Build eccentric strength with controlled step-downs, reverse lunges, split squats, and slow squats.
- Progress downhill practice gradually instead of jumping from flat trails to extreme grades.
- Schedule recovery after demanding descents, especially when soreness changes your gait.
- Keep pack weight reasonable and maintain traction with footwear suited to the surface.
- Finish the job back home with hydration, food, gentle movement, and honest attention to symptoms.
Strong quads and hips give you more options when the mountain moves beneath you. Skillful technique gives those muscles time to respond. Put both together, and steep scree becomes less of a knee-punishing slog and more of a controlled, efficient glide back to home base.