Why Flatlander Lungs Fail Above 11000 Feet
Heading for a Colorado high pass? The view is not the only thing that changes above treeline. At 11,000 feet, barometric pressure is much lower than at sea level, so every breath delivers fewer oxygen molecules to your lungs. Your body responds by breathing faster, raising heart rate, shifting fluids, and changing sleep patterns. For a flatlander arriving from near sea level, that adjustment can begin before the first serious switchback.
This is why “drink more water” is incomplete advice. Hydration supports normal circulation, but it does not restore lost atmospheric pressure or instantly increase oxygen delivery. Chugging excessive water can also create its own problems, including nausea, frequent urination, and dangerous electrolyte dilution. The more reliable strategy is staged acclimatization: sleep progressively higher, keep early exertion easy, and give your body time to respond before the summit push.
Altitude illness is a medical problem, not a fitness test. Acute mountain sickness, or AMS, commonly involves headache plus symptoms such as nausea, dizziness, unusual fatigue, or poor sleep after gaining elevation. Serious illness can progress to confusion, loss of coordination, severe breathlessness, or coughing. Review the clinical research on altitude illness before travel, and treat symptoms as information rather than an obstacle to ignore.
- Plan sleeping elevation, not just trail elevation.
- Increase effort gradually and avoid a hard first day.
- Use weather, symptoms, and biometrics together.
- Descend immediately when severe symptoms or impaired coordination appear.
The Physiological Rules of Acclimatization
Your body needs time to increase ventilation, adjust fluid balance, and produce physiological changes that improve oxygen transport. A rapid jump from sea level to a high mountain town can trigger headache, restless sleep, reduced appetite, and a racing pulse. Exercise adds another load. A short hike that feels easy at home may become a major stressor when oxygen availability is reduced.
Sleeping altitude matters most because your body spends many continuous hours there. You may hike briefly to 11,000 feet and tolerate it well, then develop symptoms after sleeping much higher. Daytime exertion altitude and overnight sleeping altitude are related, but they are not interchangeable. Above roughly 10,000 feet, a conservative plan limits the increase in sleeping elevation to about 1,600 feet (500 meters) per day, with a rest day after several ascending days. The CDC high-altitude guidance provides authoritative benchmarks and treatment principles.
For many flatland hikers, 8,000 to 9,000 feet is the essential intermediate zone. It is high enough to begin the acclimatization process but generally less demanding than sleeping directly at a high pass. Do not push through a worsening headache, repeated vomiting, confusion, stumbling, breathlessness at rest, blue lips, or a cough producing pink or frothy sputum. Stop ascending. Descend with assistance when possible, and seek emergency care for severe or rapidly worsening symptoms.
- Mild symptoms: Stop gaining elevation, rest, reassess, and avoid strenuous exertion.
- Worsening symptoms: Descend to a lower sleeping elevation and contact medical professionals.
- Neurologic or breathing symptoms: Treat as an emergency. Descend immediately and use oxygen or emergency support if available.
Day 1 and Day 2 Establishing Your Base and First Test Hike
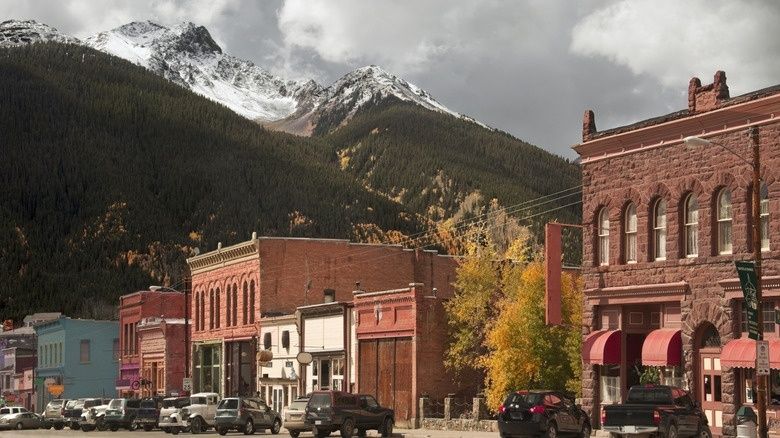
Day 1 is deliberately boring. Arrive at a foothill or mountain corridor base town between about 5,280 and 8,000 feet, such as Buena Vista (7,965 feet) or an intermediate gateway community. Keep the schedule light. Walk around town, organize your pack, eat a familiar meal, and sleep. Do not turn arrival day into a workout day. Travel itself can involve dehydration, poor sleep, long periods of sitting, and alcohol. Adding a hard hike on top of that combination is a poor opening move.
Use the first evening to establish a baseline. Note your morning resting heart rate, sleep duration, perceived energy, headache status, and any respiratory symptoms. Drink normally, favoring steady intake rather than forced water consumption. Eat carbohydrates and a balanced meal, and limit alcohol. Keep sodium reasonable, especially if restaurant meals and packaged snacks dominate the travel day. The goal is not dietary perfection. It is to remove avoidable stressors before elevation becomes the main variable.
Day 2 moves your home base higher. Sleep around 8,500 to 9,000 feet in a location such as Frisco, Silverthorne, or Georgetown (8,530 feet), while confirming current lodging, road, trail, and weather conditions before departure. Take a short two- to three-mile walk with less than 500 feet of vertical gain. Keep the pace conversational. This walk stimulates breathing mechanics and gives you useful feedback without creating a deep recovery debt.
- Check your morning symptoms before leaving the room.
- Walk slowly enough to maintain easy conversation.
- Stop if headache, nausea, dizziness, or unusual fatigue develops.
- Eat a normal recovery meal and sleep at the same elevation.
- Reassess the next morning instead of assuming the schedule must continue.
Day 3 and Day 4 Climbing High Sleeping Low and Pushing the Pass
Day 3 uses the climb-high, sleep-low pattern. Hike high enough to touch approximately 10,500 to 11,000 feet, but retreat to a sleeping elevation near 9,000 feet. The upper section should remain controlled. This is not the day to test maximum speed, chase a personal record, or add an unplanned summit. Spend time at the higher elevation only if symptoms remain mild or absent, then return to the lower sleeping base before evening.
Pack layers, food, navigation, and a conservative turnaround plan. Colorado weather can change quickly, and high terrain may become unsafe when storms build. Use your watch altimeter and weather tools as aids, not guarantees. Altimeter readings can drift with pressure changes, and wearable health readings can be affected by movement, cold, poor contact, and battery limitations.
Day 4 is the pass attempt. Depending on conditions, the objective might be Loveland Pass, Independence Pass, or another high trail saddle. Confirm that the route and access are open and safe before setting out. Start early enough to respect the local afternoon thunderstorm pattern, but do not let an early start pressure you into continuing when your body is deteriorating.
Cut your sea-level pace roughly in half. Keep steps short and steady. Nasal breathing can serve as a useful pacing check, but it is not a medical test and should not be forced when you need more air. Take regular food and fluid breaks before you feel depleted. Turn around for a throbbing or escalating headache, vomiting, confusion, loss of coordination, unusual shortness of breath, or a sudden drop in performance. Turn around for lightning risk as well. A summit is optional. Safe descent is mandatory.
- Set a firm turnaround time before leaving.
- Carry insulation, rain protection, navigation, food, and emergency communication.
- Keep the group together when symptoms or weather worsen.
- Never use a summit goal to override impaired judgment or coordination.
Tracking Biometrics to Know When Your Body Is Ready
Wearables can sharpen decisions, but they cannot diagnose altitude illness. Use them to compare trends against your own sea-level baseline. Measure morning resting heart rate under similar conditions, ideally before caffeine, food, or activity. A sustained rise of more than roughly 10 to 15 percent may indicate stress from altitude, poor sleep, dehydration, illness, or accumulated exertion. It is a caution signal, not an automatic diagnosis.
Overnight HRV can add context. A noticeable dip from your normal trend may reflect autonomic stress, but HRV is sensitive to alcohol, travel, hard training, anxiety, and fragmented sleep. Pulse oximetry is even more limited. Cold fingers, motion, loose fit, skin characteristics, and device algorithms can distort readings. A resting saturation below 85 percent, especially when repeated with symptoms, is not a cue to push harder. Stop, warm the sensor site, confirm the reading if possible, and seek medical advice or descend. Symptoms and function remain more important than a single number.
| Indicator | More reassuring pattern | Not-ready pattern | Practical response |
|---|---|---|---|
| Morning RHR | Near personal baseline | Persistent 10 to 15 percent rise | Rest, reduce effort, reassess before ascending |
| Overnight HRV | Within normal personal trend | Clear multi-night decline | Prioritize sleep and consider delaying the pass |
| Resting SpO₂ | Stable for your device and conditions | Repeated reading below 85 percent, especially with symptoms | Stop ascent, verify measurement, seek help or descend |
| Sleep and symptoms | Reasonable sleep, normal appetite, clear thinking | Severe insomnia, nausea, headache, confusion, or poor coordination | Do not ascend; descend for serious or worsening symptoms |
Look for a pattern across at least several readings. One unusual number after a cold night is less useful than a rising heart rate, falling HRV, poor sleep, and worsening headache appearing together. Record subjective wellness beside the device data. Ask three simple questions each morning: Is the headache improving? Is walking coordination normal? Is energy adequate for an easy effort? If the answers are no, the plan changes.
Lock In Your High Alpine Summit With Discipline
The four-day progression is straightforward: arrive low and recover on Day 1, sleep around 8,500 to 9,000 feet and take a short test walk on Day 2, touch 10,500 to 11,000 feet while sleeping lower on Day 3, then attempt the high pass on Day 4. This staging gives your body repeated exposure without demanding an immediate overnight jump to maximum elevation.
Summit fever is the main threat to a good plan. Respect the warning signs more than the itinerary. A lower sleeping location, a delayed start, or a full rest day is not failure. It is sound mountain judgment. Before trail time, complete a final gear check:
- Carry layers, gloves, sun protection, rain gear, food, and enough fluid for delays.
- Bring navigation, a charged phone, backup power, and emergency communication where needed.
- Use electrolytes sensibly, but do not force excessive water.
- Check current weather, access, avalanche or seasonal hazards, and route conditions.
- Tell someone at home base where you are going and when you expect to return.
Colorado rewards patience. Let the elevation rise in stages, let the data inform rather than dictate, and descend early when your body says the margin is gone. That discipline is what turns a high-pass attempt into a strong day out and a safe return home.